
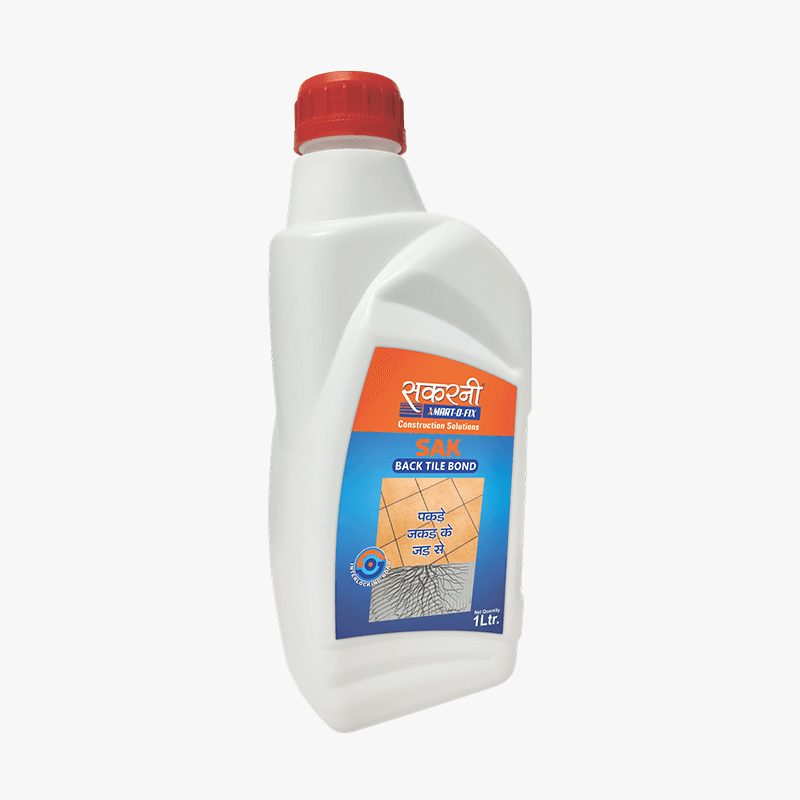
Sak Back Tile Bond
High-Performance Interlocking Back Tile Primer
SAK BACK TILE BOND is a professional-grade, high-viscosity liquid bonding agent engineered to prevent tile debonding and hollow sounds. Featuring advanced interlocking bond technology, it is applied directly to the back of large-format tiles, vitreous stones, and porcelain slabs before installation with thin-set adhesives. It acts as a powerful structural bridge that dramatically enhances adhesion, absorbing shear stresses caused by thermal movement and substrate deflection.
Adhesion
Bond Strength
Interlocking
Grip Mechanics
Tile Debonding
& Failure
Engineered to Protect Tiled Surfaces from Hollow Sounds, Dynamic Shear Stresses & Structural Pop-outs
Conventional Tile Adhesives
Traditional systems often suffer from:
Poor wet-ability on dense, smooth, non-porous tile backing profiles
Inability to handle differential thermal expansion in large formats
Moisture migration resulting in structural crystallization and debonding
Sak Back Tile Bond
It is specially formulated to provide:
High-penetration interlocking bond mechanics that grip slick tiles firmly
Superior flexibility to handle dynamic building stresses and movements
High coverage wet-adhesion bridge that eliminates hollow spots completely
Long-term chemical resistance against water and alkaline chemical attacks
where to use


application process
Apply only on properly prepared and clean tile rear profiles. Follow recommended surface preparation and application practices to achieve optimum durability and a flawless finish.
Technical properties


Frequently Asked Questions
1. What is it used for?
2. Can it be used outdoors?
3. Does it stop hollow tile sounds?
4. Is it ready to use or does it require mixing?
5. Is it compatible with regular cement mortars?
Company
Products
Download our Apps
Sakarni Premium Club

iMIdAS-Sakarni Bandhan

Follow Our Journey


© 2026 All Rights Reserved. Sakarni Plaster Pvt Ltd. Cookie Preferences
" height="25.25135132999958px" id="l52hnrJqN" transform="translate(40.607 0)" width="24.79527169444519px"/><path d="M 53.009 28.832 L 56.456 38.181 L 49.556 38.181 L 53.004 28.832 Z M 47.975 42.426 L 58.008 42.426 L 59.644 46.866 L 70.571 46.866 C 68.73 41.948 61.281 27.981 72.869 31.523 C 72.869 31.523 74.569 32.135 75.869 32.374 C 77.173 32.612 78.345 32.63 79.798 32.348 C 81.252 32.065 82.586 30.98 82.586 30.98 C 82.586 30.98 81.46 30.655 80.523 30.26 C 79.585 29.865 77.599 28.971 76.858 28.576 C 76.112 28.181 73.273 26.571 73.014 26.098 C 72.754 25.625 73.09 25.451 73.09 25.451 C 73.09 25.451 73.491 25.16 74.663 26.089 C 75.839 27.018 78 28.042 78.929 28.472 C 79.858 28.901 83.05 29.991 84.631 30.121 C 86.208 30.247 87.205 30.299 89.174 29.904 C 91.139 29.509 92.187 27.66 92.187 27.66 C 88.88 26.289 80.092 22.955 77.024 21.05 C 75.575 20.147 76.704 18.876 78.302 19.731 L 79.73 20.564 C 79.73 20.564 82.394 21.983 84.959 22.999 C 87.529 24.014 90.819 24.891 92.831 25.286 C 94.843 25.681 97.898 25.82 98.964 25.698 C 100.029 25.577 101.879 25.243 103.575 24.34 C 105.275 23.437 106 21.97 106 21.97 C 105.356 21.771 103.835 21.384 102.198 20.85 C 92.047 17.547 81.601 6.506 74.386 10.842 C 57.569 20.95 59.201 16.536 53 0 C 46.799 16.532 48.431 20.946 31.614 10.842 C 24.399 6.506 13.953 17.547 3.802 20.85 C 2.161 21.384 0.644 21.771 0 21.97 C 0 21.97 0.729 23.437 2.425 24.34 C 4.121 25.243 5.971 25.577 7.036 25.698 C 8.102 25.82 11.157 25.681 13.169 25.286 C 15.181 24.891 18.475 24.014 21.041 22.999 C 23.61 21.983 26.27 20.564 26.27 20.564 L 27.698 19.731 C 29.296 18.876 30.429 20.147 28.976 21.05 C 25.908 22.955 17.12 26.289 13.813 27.66 C 13.813 27.66 14.857 29.509 16.826 29.904 C 18.795 30.303 19.788 30.251 21.369 30.121 C 22.95 29.995 26.142 28.901 27.071 28.472 C 28 28.042 30.165 27.018 31.337 26.089 C 32.513 25.16 32.91 25.451 32.91 25.451 C 32.91 25.451 33.246 25.625 32.986 26.098 C 32.722 26.571 29.884 28.181 29.142 28.576 C 28.401 28.971 26.415 29.865 25.477 30.26 C 24.54 30.655 23.414 30.98 23.414 30.98 C 23.414 30.98 24.748 32.065 26.202 32.348 C 27.655 32.63 28.831 32.617 30.131 32.374 C 31.435 32.135 33.131 31.523 33.131 31.523 C 44.715 27.986 37.27 41.952 35.424 46.866 L 46.352 46.866 L 47.988 42.43 Z" fill="rgb(3, 78, 162)" height="46.865605354309196px" id="Z0KZJ2Zdy" transform="translate(0 10.134)" width="106px"/></g></svg>)
" height="29.503355160891616px" id="wb2jx_zQ3" transform="translate(0.355 0.425)" width="68.9317761739095px"/><path d="M 25.244 13.507 C 24.83 13.191 24.123 11.976 23.213 11.916 C 21.532 11.786 19.635 12.746 18.749 14.089 C 17.626 16.129 18.843 17.446 21.452 17.016 C 22.624 16.773 25.016 15.833 25.242 13.507 Z M 0.82 12.36 C 0.82 12.36 0.821 12.36 0.821 12.359 L 0.82 12.364 Z M 1.13 8.082 C 2.362 6.277 7.016 5.669 8.706 7.091 C 10.126 8.158 11.129 9.789 10.573 12.131 L 11.306 12.224 C 11.774 12.12 12.113 11.849 12.361 11.469 L 12.467 8.764 L 11.04 8.826 L 11.133 6.871 L 37.448 6.871 L 37.401 7.755 C 39.942 6.24 42.873 5.971 45.425 6.558 C 48.914 7.746 48.624 11.611 47.091 13.758 C 45.471 15.717 43.407 16.435 40.469 16.097 C 41.101 17.387 41.993 18.438 43.145 19.447 C 44.692 20.749 46.524 21.447 48.023 20.813 L 48.431 22.133 C 45.33 22.446 42.868 21.469 40.141 18.907 C 38.927 17.755 37.826 16.451 37.045 14.735 L 39.209 13.151 C 39.772 14.442 40.117 14.687 41.32 14.829 C 43.714 14.846 45.998 12.497 45.876 9.806 C 45.653 7.575 43.314 7.058 40.742 8.217 C 39.102 9.091 38.203 10.351 37.609 11.904 L 36.493 8.758 L 27.836 8.778 L 27.641 11.687 C 30.264 9.291 33.121 9.331 34.563 11.324 C 35.957 13.253 36.198 16.3 34.32 18.342 C 32.822 20.031 29.635 20.506 28.749 18.831 L 27.991 16.693 C 27.803 15.918 28.625 15.655 29.014 16.442 C 30.14 18.069 32.479 17.429 33.529 15.853 C 34.679 13.544 33.79 11.993 31.755 12.235 C 30.149 12.406 28.053 14.204 27.417 15.871 C 27.324 17.531 26.892 19.178 27.592 20.487 C 28.129 21.391 27.739 21.846 27.041 21.577 C 25.667 20.846 24.819 19.38 24.859 17.737 C 22.373 20.007 18.493 20.104 17.165 16.366 C 16.215 13.193 17.535 10.987 20.043 10.037 C 22.327 9.235 24.23 9.906 25.289 11.526 L 25.503 8.762 L 14.789 8.767 L 14.159 19.251 C 14.113 20.362 14.818 21.158 15.708 22.058 C 14.611 21.853 13.526 21.418 12.576 20.553 C 12.031 19.986 11.78 19.144 11.955 17.9 L 12.183 13.673 C 11.351 14.022 10.628 14.009 9.999 13.409 C 8.71 15.475 5.89 16.044 3.631 15.293 L 11.364 25.018 C 13.402 27.42 15.156 28.393 17.764 28.587 C 16.844 29.233 15.934 29.589 14.91 29.486 C 12.337 29.144 10.569 27.453 9.078 25.669 C 7.277 23.473 5.494 21.271 3.75 19.057 C 2.477 17.44 1.223 15.817 0 14.186 L 2.534 12.604 C 4.236 15.338 7.944 13.555 8.473 10.638 C 8.768 8.951 8.265 7.955 6.699 7.924 C 3.353 8.016 1.841 9.849 0.821 12.359 Z M 51.408 16.642 C 52.914 16.673 54 16.453 54.401 15.693 C 54.77 14.911 54.21 13.673 53.617 13.427 C 52.662 13.087 50.874 13.64 50.263 14.746 C 49.86 15.607 50.006 16.531 51.408 16.642 Z M 64.42 6.853 C 63.656 4.577 61.744 2.12 59.535 1.927 C 58.111 1.789 56.709 3.104 56.341 4.311 C 56.053 5.471 56.826 6.286 57.695 6.853 Z M 48.659 6.858 L 54.826 6.858 C 53.078 4.869 54.111 1.36 57.708 0.193 C 61.746 -0.96 64.601 3.284 65.88 6.833 L 68.932 6.864 L 68.813 8.767 L 66.283 8.76 L 65.652 18.578 C 65.454 20.113 66.079 21.16 67.247 21.875 C 65.268 21.875 63.425 21.395 63.425 18.795 L 64.03 8.755 L 60.617 8.764 L 59.941 18.927 C 59.897 20.104 60.636 21.049 61.558 21.789 C 59.668 21.364 57.757 20.686 57.732 18.875 L 58.08 12.686 C 57.249 13.169 56.339 13.413 55.409 13.307 C 57.074 16.167 55.889 18.566 53.036 18.884 C 49.1 19.149 47.766 14.778 49.736 12.655 C 50.859 11.518 52.163 11.111 53.783 11.155 C 55.388 11.155 57.214 10.929 58.246 10.311 L 58.352 8.747 L 48.568 8.787 L 48.657 6.856 Z" fill="rgb(235, 110, 3)" height="29.50335516089161px" id="DDLAVrKQd" width="68.93177235921223px"/><path d="M 1.271 1.371 L 1.706 1.371 C 1.803 1.371 1.876 1.353 1.925 1.315 C 1.974 1.278 1.998 1.222 1.998 1.147 C 1.998 1.073 1.974 1.018 1.929 0.98 C 1.883 0.944 1.814 0.924 1.721 0.924 L 1.271 0.924 Z M 0.895 2.318 L 0.895 0.635 L 1.803 0.635 C 1.974 0.635 2.113 0.678 2.217 0.764 C 2.322 0.849 2.373 0.962 2.373 1.104 C 2.373 1.265 2.315 1.384 2.198 1.458 C 2.167 1.478 2.133 1.495 2.093 1.509 C 2.115 1.516 2.135 1.527 2.153 1.536 C 2.255 1.593 2.31 1.691 2.313 1.825 L 2.322 2.102 C 2.322 2.156 2.33 2.196 2.341 2.218 C 2.352 2.242 2.372 2.26 2.401 2.273 L 2.401 2.318 L 1.985 2.318 C 1.976 2.3 1.967 2.264 1.96 2.205 C 1.952 2.147 1.949 2.085 1.947 2.02 L 1.947 1.864 C 1.943 1.787 1.92 1.735 1.872 1.702 C 1.827 1.669 1.75 1.655 1.642 1.655 L 1.267 1.655 L 1.267 2.32 L 0.891 2.32 Z M 1.59 0 C 2.465 0 3.179 0.667 3.179 1.487 C 3.179 2.307 2.465 2.975 1.59 2.975 C 0.715 2.975 0 2.307 0 1.487 C 0 0.667 0.715 0 1.59 0 Z M 0.248 1.487 C 0.248 2.178 0.849 2.742 1.59 2.742 C 2.33 2.742 2.931 2.178 2.931 1.487 C 2.931 0.796 2.328 0.233 1.59 0.233 C 0.849 0.233 0.248 0.796 0.248 1.487 Z" fill="rgb(35, 31, 32)" height="2.9745454762198698px" id="OUWSzelqg" transform="translate(66.866 3.067)" width="3.179166666666447px"/></g></svg>)
